Reporters
CodeceptJS prints test results to the console by default (see CLI output). For an HTML report, a pull-request comment, JUnit XML, or a hosted dashboard, use Testomat.io Reporter.
Testomat.io Reporter is open source. It can send create reports of various types:
- Local files — HTML, CSV, and Markdown reports written to disk.
- CI/CD pipeline reports — reports added as comments to GitHub, GitLab, or Bitbucket pull requests.
- Cloud Services — a hosted dashboard on app.testomat.io to keep track of results history and get analytics.
You choose the destinations. The reporter collects steps, screenshots, videos, traces, and logs once and sends them everywhere you enabled.
Install
Section titled “Install”npm install @testomatio/reporter --save-devEnable the reporter plugin and turn on the local reports you want:
plugins: { testomatio: { enabled: true, require: '@testomatio/reporter/codecept', html: true, // markdown: true, // csv: true, // reportDir: 'output/report', },}
html,markdown, andcsvare config switches for local reports. Local reports are stored in filesystem inoutput/reportdir by default.
Local reports and remote destinations
Section titled “Local reports and remote destinations”Local reports are turned on with config switches and saved to disk:
| Config switch | File in reportDir |
|---|---|
html: true | testomatio-report.html |
markdown: true | testomatio-report.md |
csv: true | report.csv |
Remote destinations need an access token. A token is a secret, so pass it through an environment variable or CI secret instead of committing it to the config file:
| Destination | Token variable |
|---|---|
| Run result on app.testomat.io | TESTOMATIO |
| Comment on a GitHub Pull Request | GH_PAT (${{ github.token }} in Actions) |
| Comment on a GitLab Merge Request | GITLAB_PAT (token with api scope) |
| Comment on a Bitbucket Pull Request | BITBUCKET_ACCESS_TOKEN (repo access token) |
One run feeds every destination you enabled. On CI, keep the report switches in the config and pass only the tokens as environment variables:
- run: npx codeceptjs run env: GH_PAT: ${{ github.token }} # → Print report as PR comment # TESTOMATIO: ${{ secrets.TESTOMATIO }} # → Send report to testomat.io- uses: actions/upload-artifact@v4 if: always() with: name: codeceptjs-output path: output/The GitHub destination also needs the job to grant permissions: pull-requests: write.
For the full list of options and environment variables, see the reporter configuration reference.
HTML Report
Section titled “HTML Report”A local, self-contained HTML file saved to output/report/testomatio-report.html. It holds the run summary and, per test, its steps, screenshots, logs, and error. It needs no API key and no service, so it works anywhere — open it locally or attach it to a CI build.
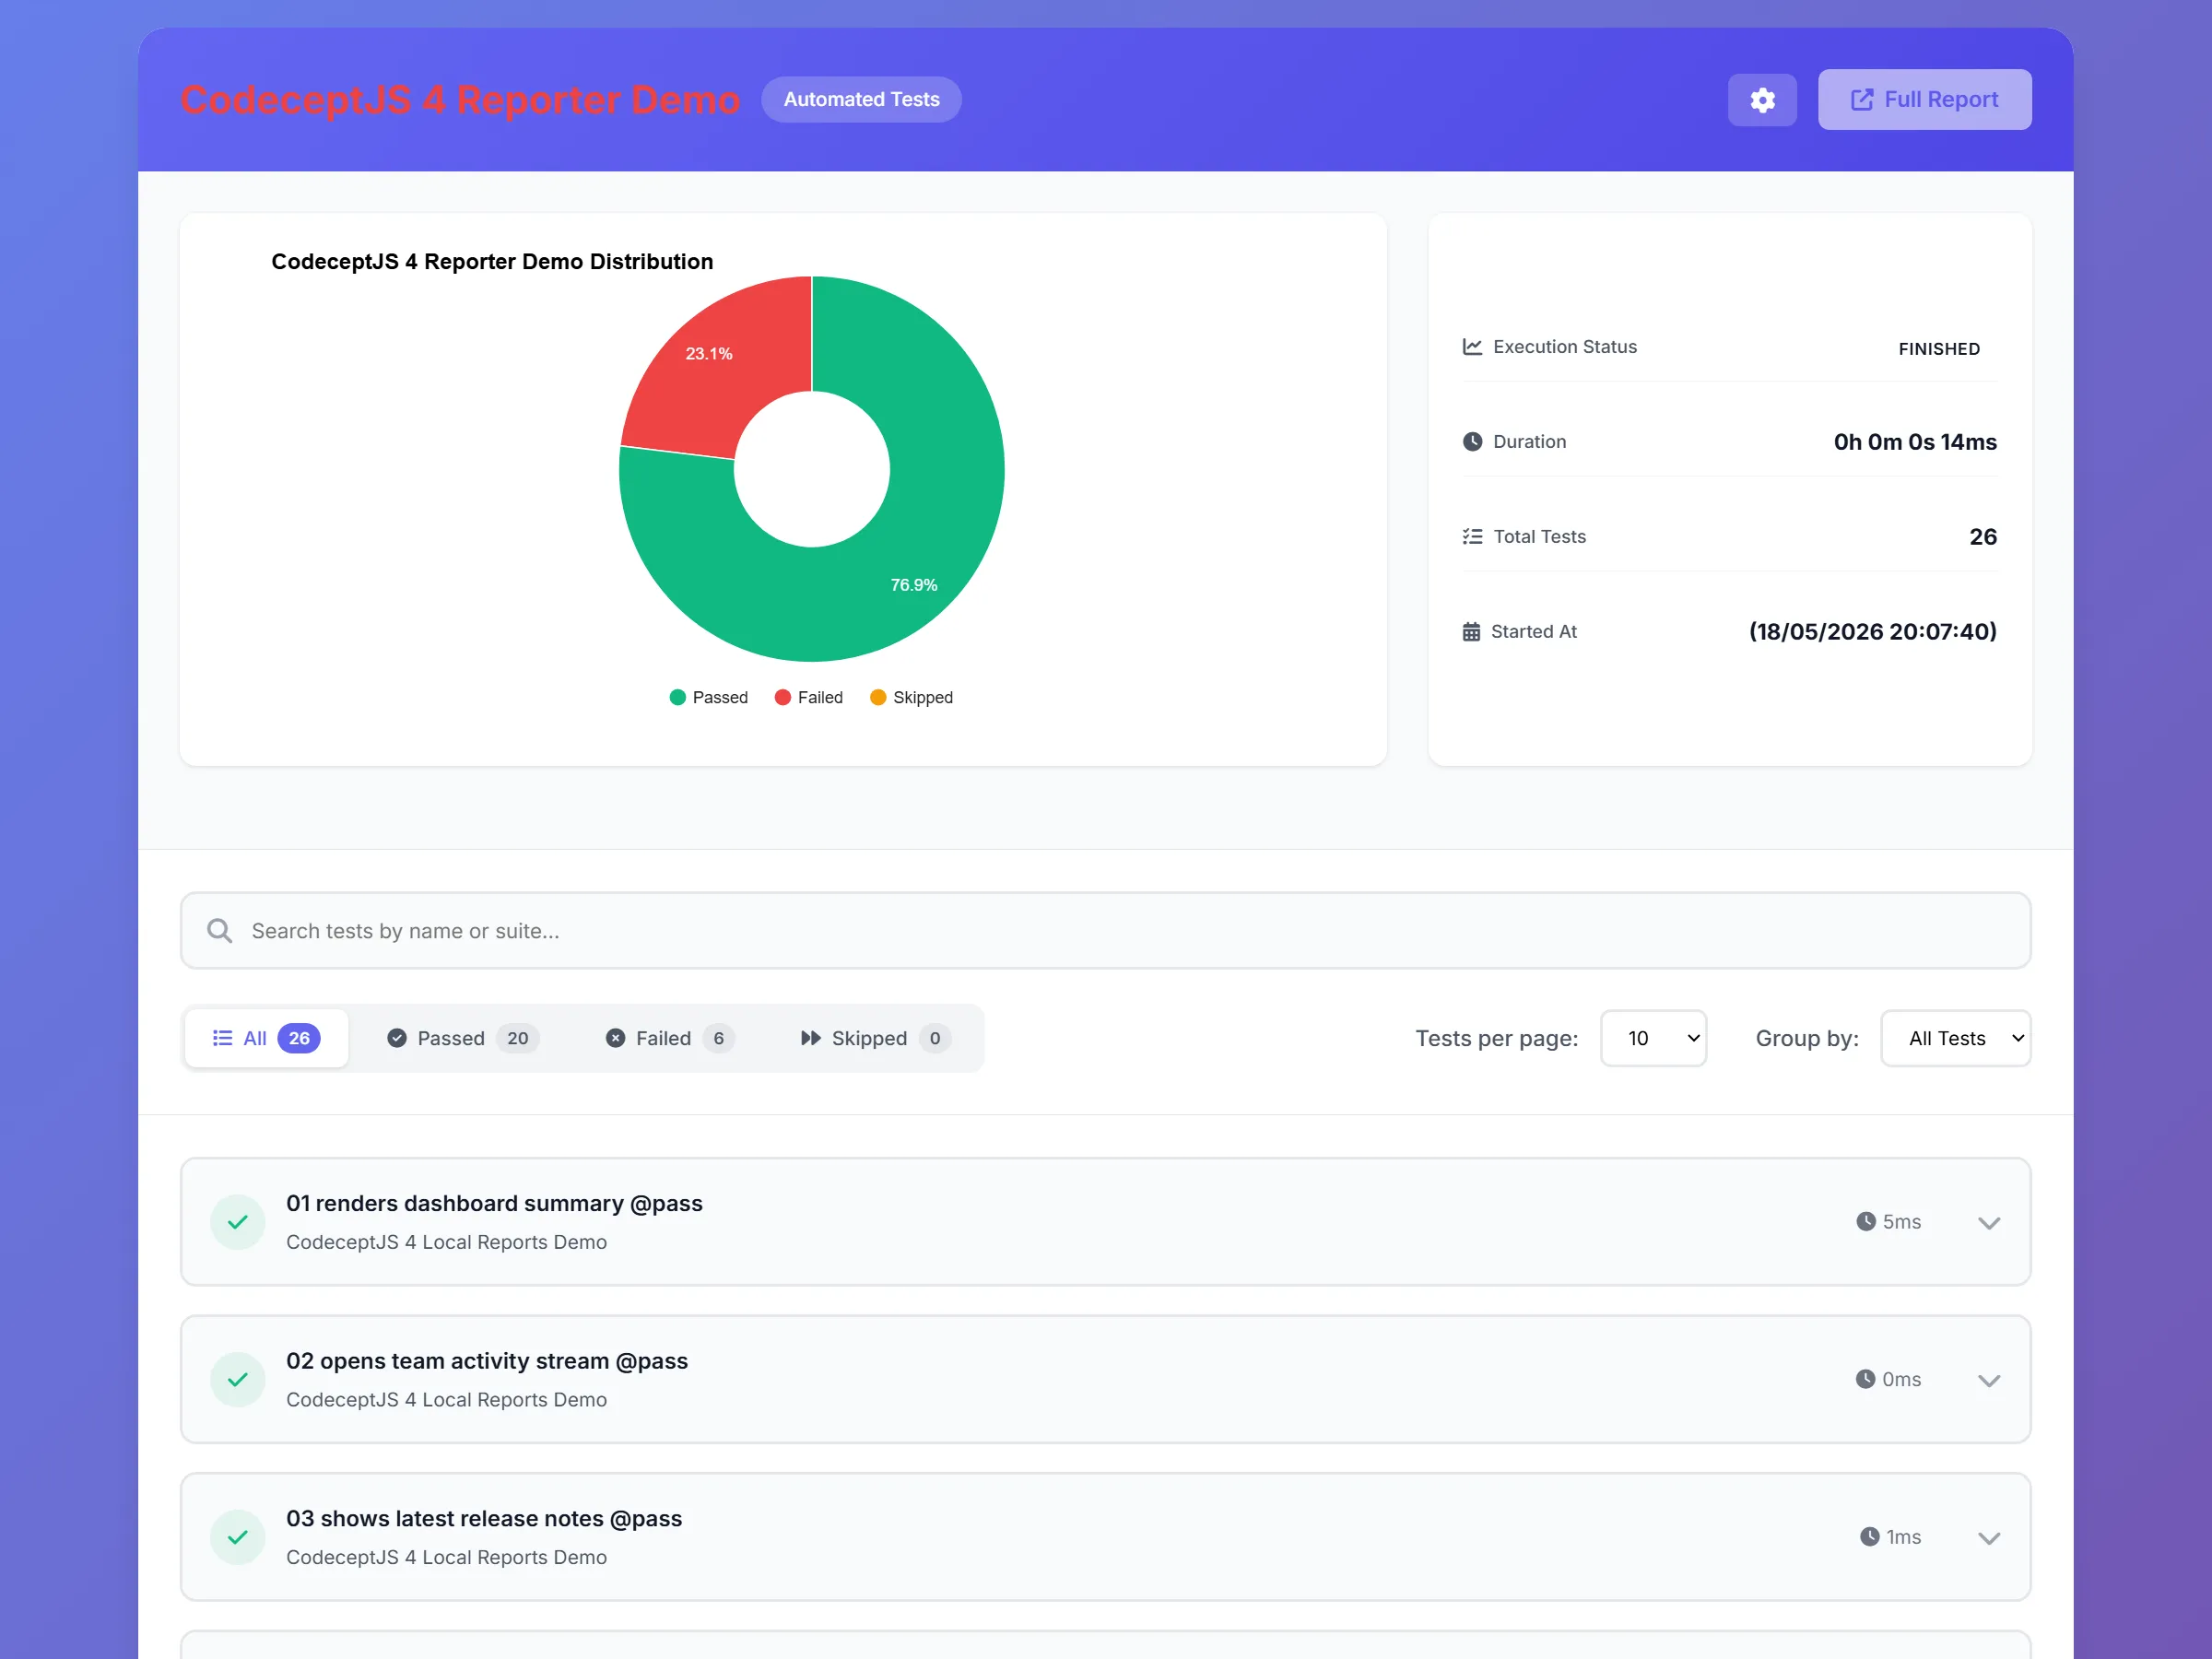
Enable it with html: true in plugins.testomatio and run npx codeceptjs run. To change the file name or folder, see the HTML pipe docs.
CSV Report
Section titled “CSV Report”A local CSV file saved to output/report/report.csv, with one row per test — suite, title, and status. Use it in spreadsheets or data pipelines.
Enable it with csv: true in plugins.testomatio. See the CSV pipe docs.
Testomat.io Cloud Report
Section titled “Testomat.io Cloud Report”A remote destination: the run is sent to app.testomat.io, a hosted dashboard with run history, flaky-test detection, parallel-run merging, re-running failed tests, and notifications. Free for small teams.

Set the TESTOMATIO environment variable to your project API key and run the tests. Run titles, run groups, shared runs, and publishing options: Testomat.io pipe docs.
To view artifacts on the cloud, upload them to S3 storage. Images come from the screenshot plugin, videos from the screencast plugin (or the Playwright helper’s video and trace). Any S3 provider works: AWS S3, Cloudflare R2, Google Cloud Storage (interoperability mode), DigitalOcean Spaces, MinIO.
GitHub Report
Section titled “GitHub Report”A remote destination: a comment on the Pull Request with run status, pass/fail/skip counts, stack traces of the failures, screenshots, and the slowest tests. Re-running the workflow replaces the previous comment.
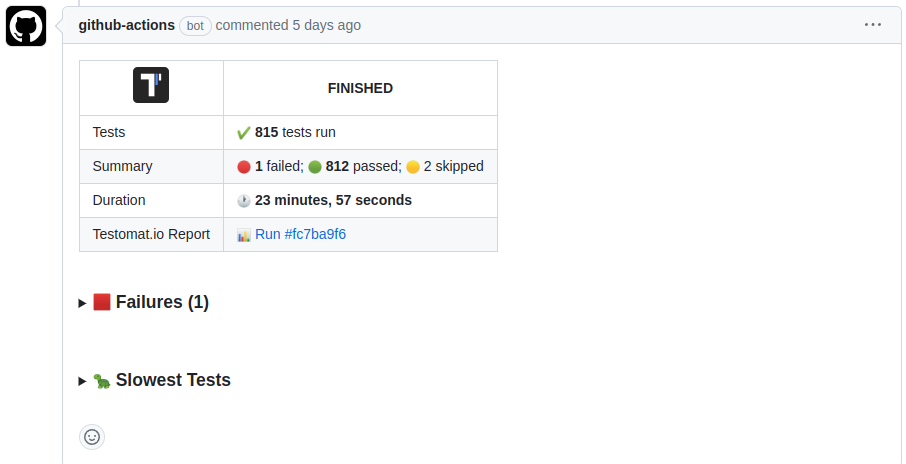
Set GH_PAT to a GitHub token (${{ github.token }} works in Actions) and grant the job permissions: pull-requests: write. More options: GitHub pipe docs.
GitLab Report
Section titled “GitLab Report”A remote destination: a comment on the Merge Request with the same summary. Run it in merge-request pipelines ($CI_PIPELINE_SOURCE == "merge_request_event").
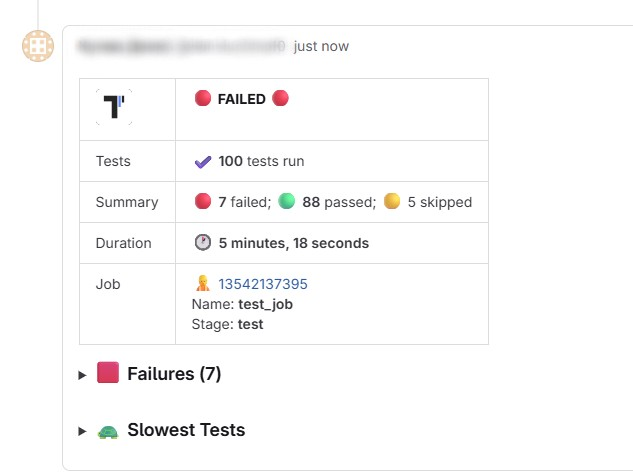
Set GITLAB_PAT to a Personal or Project Access Token with api scope. More options: GitLab pipe docs.
Bitbucket Report
Section titled “Bitbucket Report”A remote destination: a comment on the Pull Request with the same summary. Comments are created only in pull-requests pipelines.
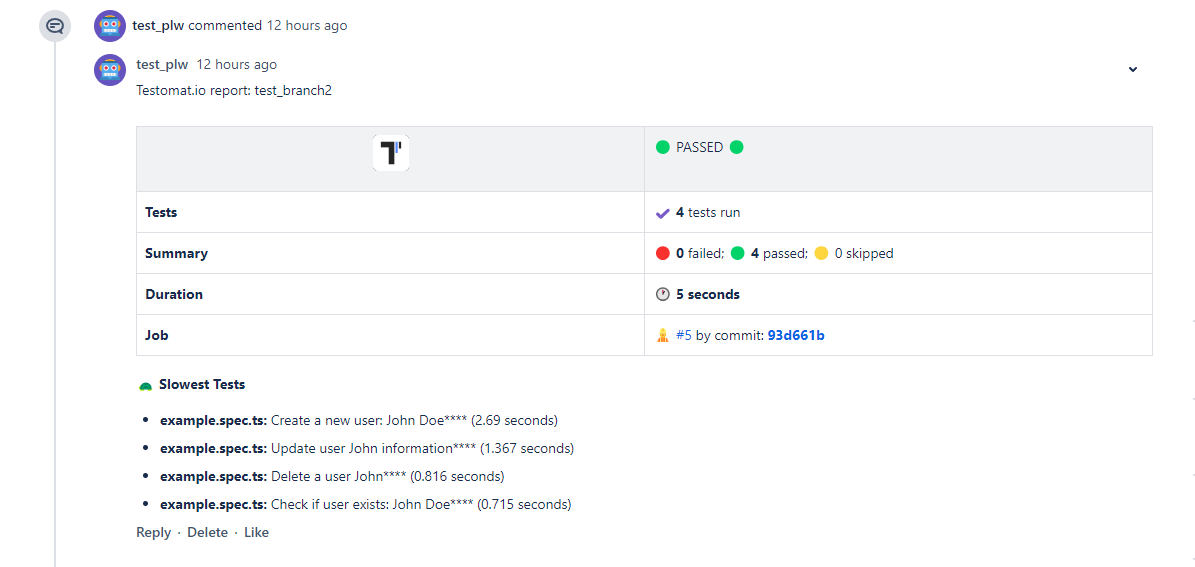
Set BITBUCKET_ACCESS_TOKEN to a repository access token with Pull requests: Write and Repository: Read. More options: Bitbucket pipe docs.
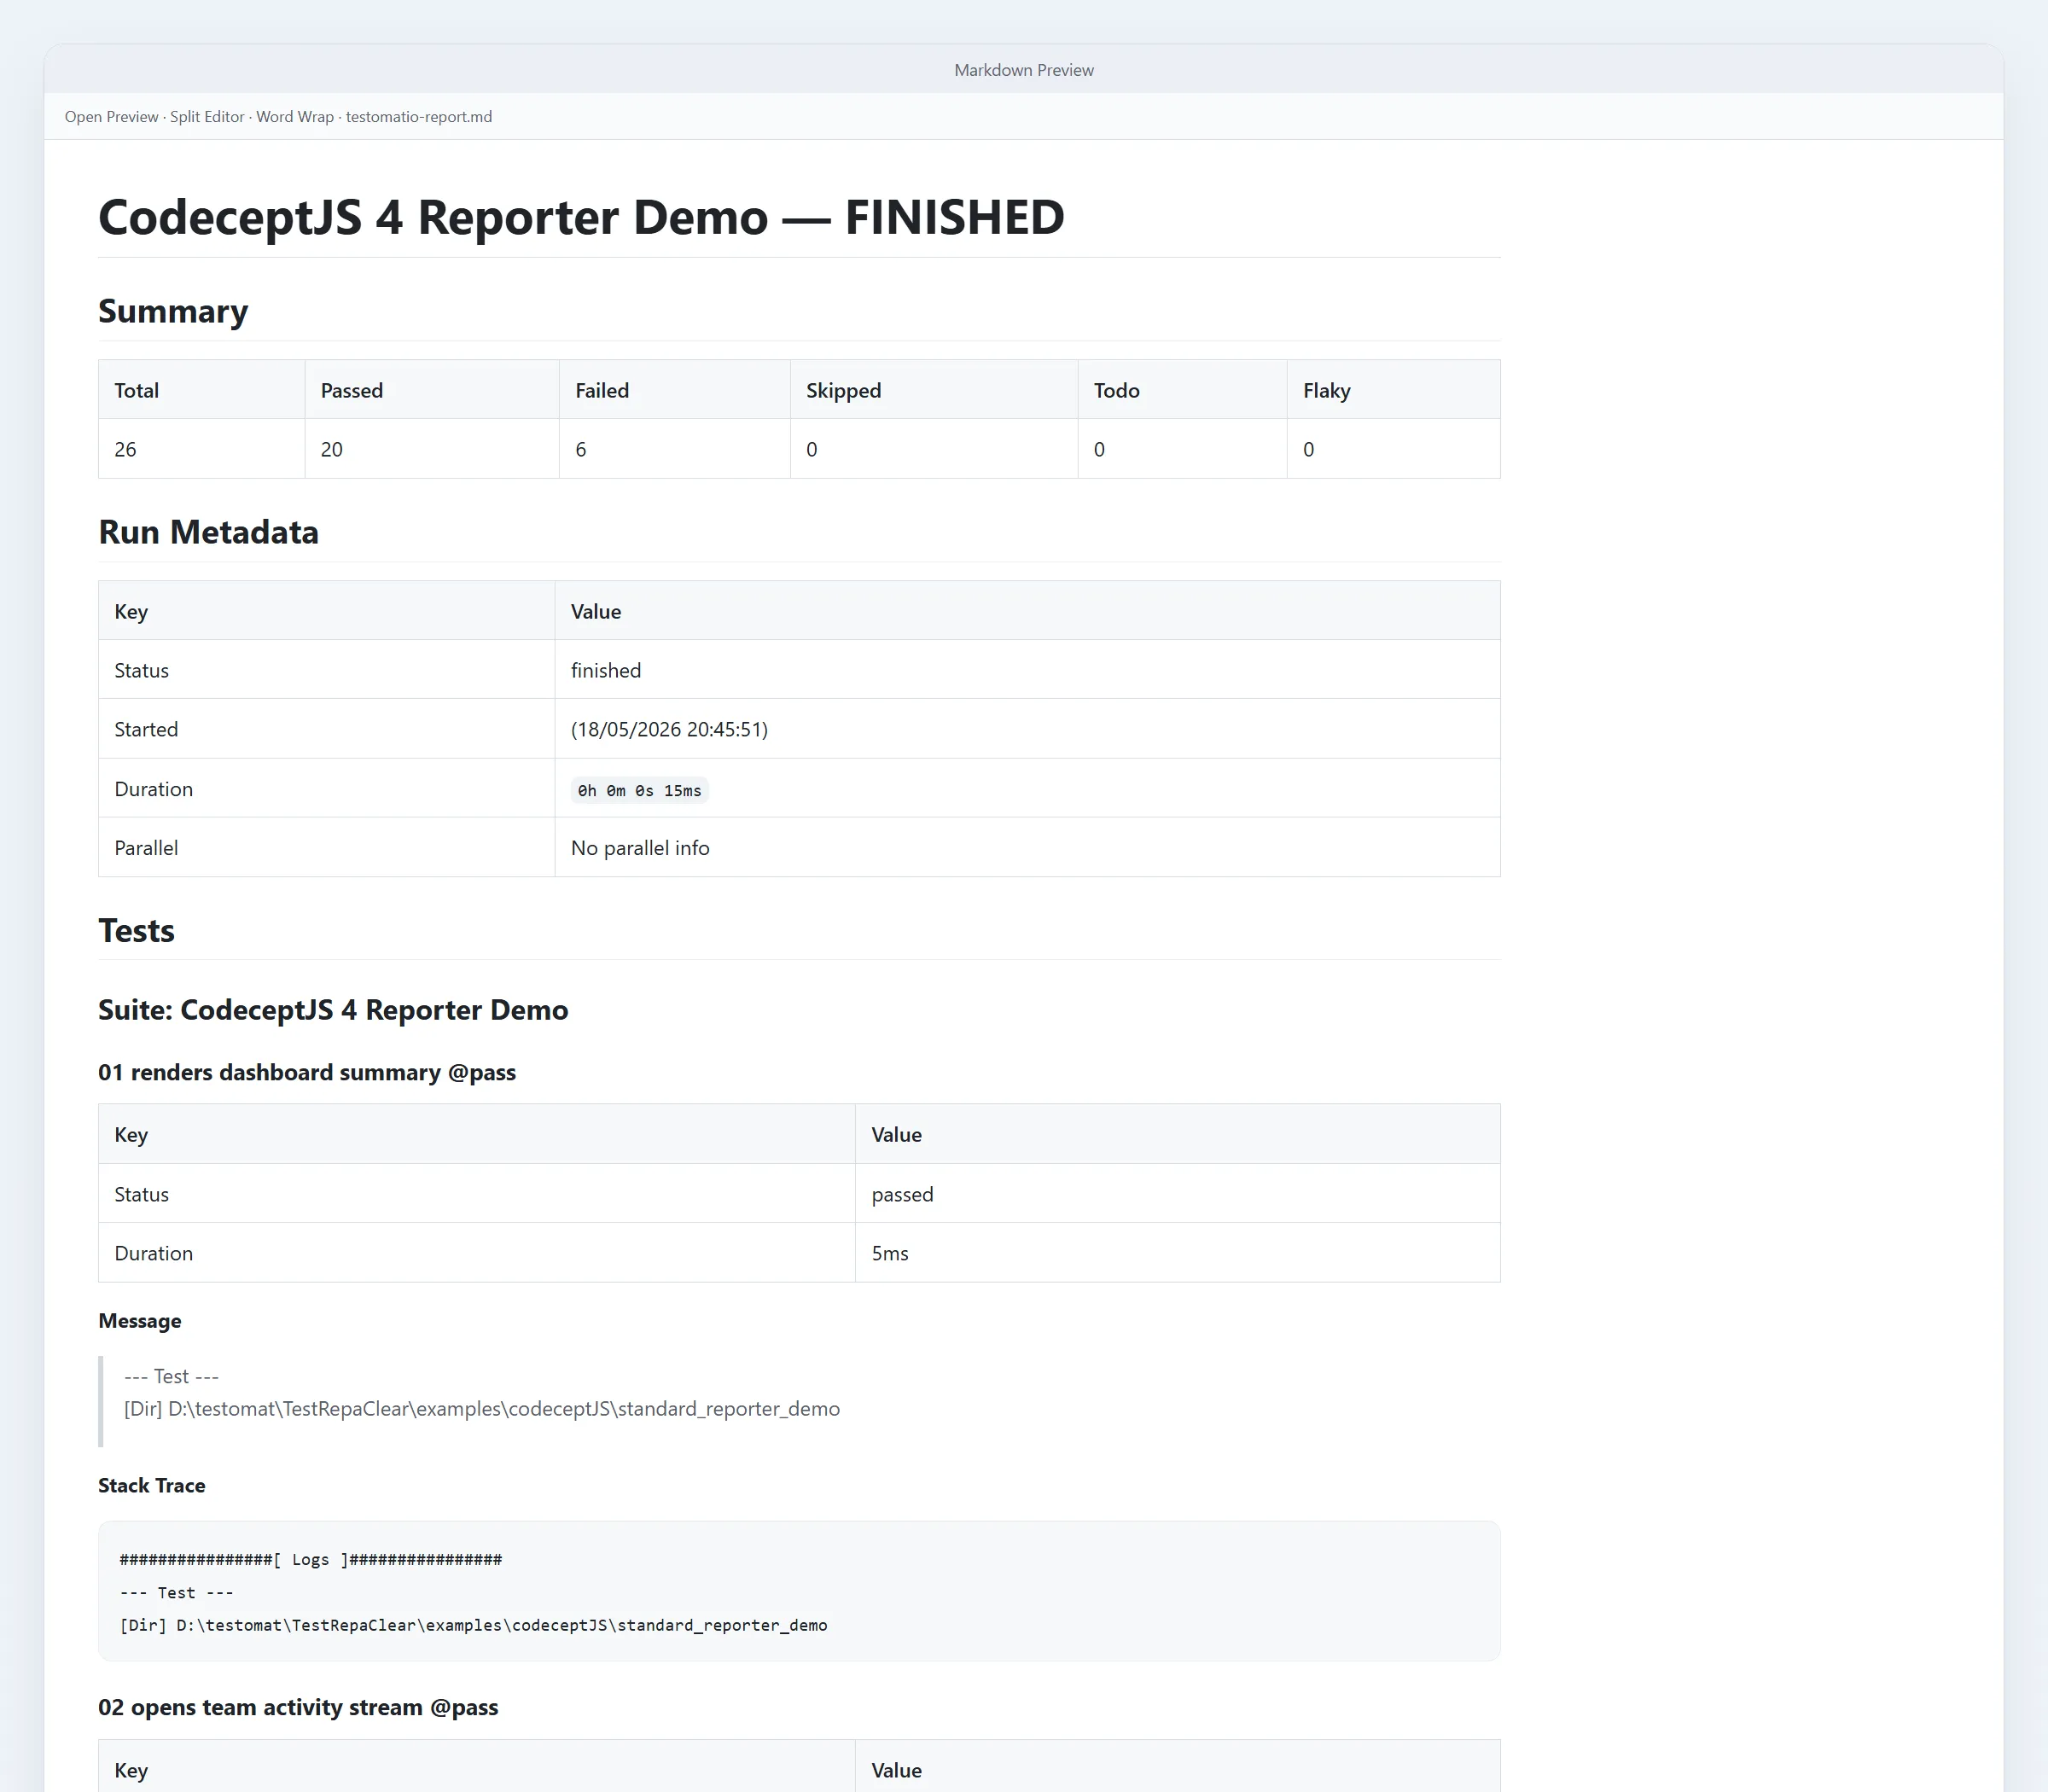
Markdown Report
Section titled “Markdown Report”A local, self-contained Markdown file saved to output/report/testomatio-report.md. It renders in PR comments, CI job summaries, and Slack, and is convenient for AI agents reading test results. It needs no API key.
Enable it with markdown: true in plugins.testomatio. To change the file name, folder, or title, see the Markdown pipe docs.
On GitHub Actions, append it to the job summary: cat output/report/testomatio-report.md >> "$GITHUB_STEP_SUMMARY".
JUnit XML
Section titled “JUnit XML”For CI servers that read JUnit XML (Jenkins, GitLab CI, CircleCI, the GitHub Actions test tab), enable the junitReporter plugin. It writes output/report.xml with CodeceptJS steps included — unlike mocha-junit-reporter.
plugins: { junitReporter: { enabled: true },}Options (outputName, output, testGroupName, attachMeta, attachSteps, stepsInFailure): plugin docs.
ReportPortal
Section titled “ReportPortal”ReportPortal is an open-source self-hosted dashboard for test reports. Publish with the CodeceptJS Agent for ReportPortal.
Custom reporter
Section titled “Custom reporter”The customReporter plugin hooks into test events:
plugins: { customReporter: { enabled: true, onTestFailed: (test, err) => console.log('FAIL', test.title, err.message), onResult: result => { // result.stats, result.tests }, },}Hooks: onHookFinished, onTestBefore, onTestPassed, onTestFailed, onTestSkipped, onTestFinished, onResult.
For built-in Mocha reporters, use --reporter:
npx codeceptjs run --reporter dotThe bundled
Mochawesomehelper was removed in 4.x. For an HTML report use the Testomat.io Reporter HTML pipe (see above); for JUnit XML use thejunitReporterplugin. Wiring multiple Mocha reporters throughmocha-multi/cmris not recommended — prefer these instead.
Plugins exist for TestRail and Tesults.
CLI output
Section titled “CLI output”By default CodeceptJS prints test names and failures. Add --steps to see each step, --debug for runner notices, or --verbose for full stack traces and events (use this when reporting bugs).
npx codeceptjs run --stepsnpx codeceptjs run --debugnpx codeceptjs run --verbosedry-run lists tests and steps without running them:
npx codeceptjs dry-run --steps